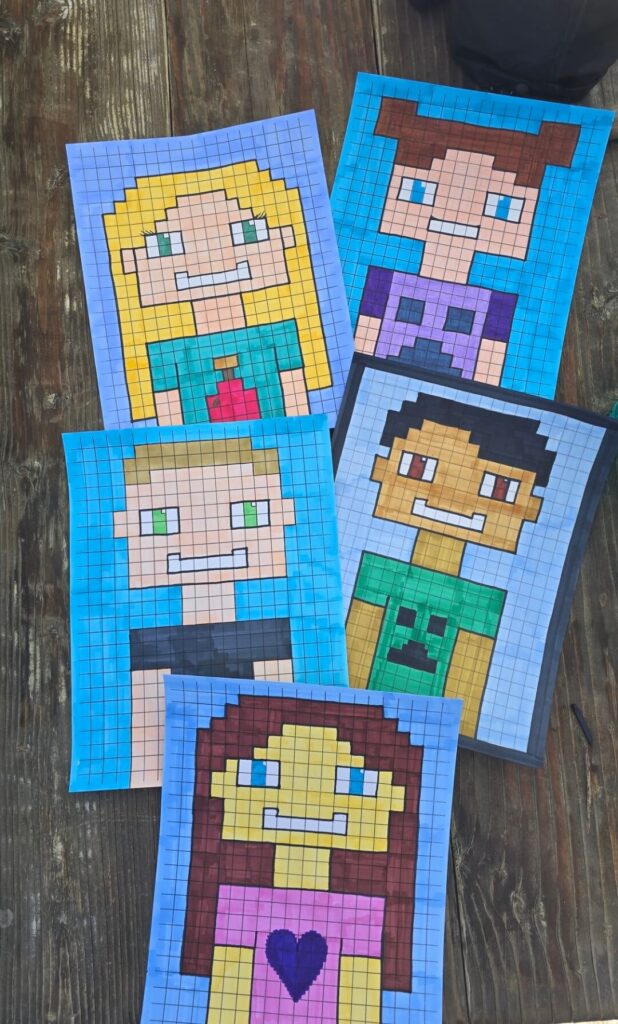
Pixel art is a digital art style made up of small squares (called Pixels) that come together to form pictures. It became popular in early video games & is now a fun and creative part of pop culture, seen in games like Minecraft and in retro-style artwork. Pixel art shows how simple shapes and colors can create detailed, expressive designs!
Grade Level: 2nd-5th
Art Elements: Line, Shape, Color
Medium(s): Colored Pencils or Markers
Materials:
1 sheet of cardstock with grid preprinted (Download Here!)
Pencil with eraser
Black Marker/Sharpie
Colored Pencils or Markers
Lesson Day:
1. Pass out 1 sheet of grid paper per student, various colored pencils or markers, a few step by step instruction sheets, and hairstyle guides for each table.
2. Have the kids get out their pencils & write their name on the back of their paper!
3. The preprinted black rectangle should be positioned toward the bottom of the sheet. This will be the outline of their shirts. It will be easiest to start from the bottom of the paper & work their way up to their hair.
4. *Use PENCIL first for trail & error, consult the step-by-step instruction sheet for guidance! From the top left corner of the black rectangle, count two squares to the right and two squares down. Draw a line from that intersection to the bottom of the sheet. Repeat for the right side: From the top right corner of the black rectangle, count two squares left, and two squares down, drawing a line from that intersection to the bottom of the sheet. We just created the arms! Have them add a line across each side for their shirt sleeves.
5. Find the top center of the shirt. Count two left from the center and two right from the center. Draw a line up each side, 3 squares high, to create the neck. This should be 4 squares wide by 3 squares tall.
6. From the top of each end of the neck, count four squares to the left, and four squares to the right, drawing a line to make the bottom of the face. From the end of each side of that horizontal line, draw a line up each side that is 6 squares tall.
7. Next, count one square up from the bottom face line. Find the center and count 3 spaces to the left, and 3 spaces to the right, drawing a line to create your mouth. The smile part of your mouth will be 1.5 lines tall and 1 square wide. Draw a line back down to the first square and count 4 squares across to create the top of your mouth.
8. From the top 2 squares of your vertical face lines, count one square down to create a rectangle that is 1 square wide and 2 squares long on the outside to create ears.
9. Add two eye rectangles. The bottom line of the 2×3 eye rectangles is in line with the middle of the ears, 1 square way from the edge of the face. Add vertical lines to separate the iris from the sclera (white part). Draw a little square in the top right corner of the (center) iris for the pupil.
10. Share Hair Sample Sheets for students to get inspiration on how they would like to create their hair.
11. Once artists are happy with their outlines, have them color in all the squares using the correct hair & eye colors for each self portrait. Give them creative freedom to design their shirts and backgrounds how they would like.
12. Once the coloring is complete, outline each section with black marker so that the portrait really pops!